The second step is soaking your fingernails in a warm water bath; this softens the cuticles. It is important to soften the cuticles as making French nails require trimming any excessive skin along the nail. Doing the trimming without softening the cuticle first will only result in possible cuts surfacing later on.
Make the cuticle ready for cleaning; gently push it back with an orangewood stick; if you are faced with a lot of cuticle, make use of cuticle remover to accomplish the job. Cuticle removal takes some time to finish properly; do not rush and eliminate the occurrence of cuts and the like; exert some effort and see how it makes a difference with the final outcome of your French nails. Be careful when managing cuticle build up by allotting time and effort on the task at hand.
Do not miss applying hand cream to the nails and rub them in well; leave the cream in for about two to three minutes and wipe away any excess cream with some facial tissue. To protect the cuticles you have just worked on, hand cream is necessary; the hand cream also serves a second purpose of keeping the fingernails moist enough. When this step has been accomplished, now is when you decide in relation to what nail polishes you will be using.
Polish can now be applied to you French nails; start with a clear basecoat allowing each fingernail to dry very well afterwards. The basecoat is important in any application of nail polish as it builds the foundation for the overall appearance of the fingernail. It is a basic fact that polish should be allowed to dry after each coat is applied to achieve a clear and balanced look among the fingernails; no lumps whatsoever are formed this way.
As the basecoat is drying, select a pale shaded color of polish that will be applied afterwards; this color is applied in thin layers; the color should match the nail plate for a better look. As what was done with the basecoat, apply the neutral polish in layers; about two to three thin layers will do perfectly; again, allow each coat to dry first before painting on another one. The finale to this polishing aspect for French nails is painting a white strip on the tips of the fingernails.
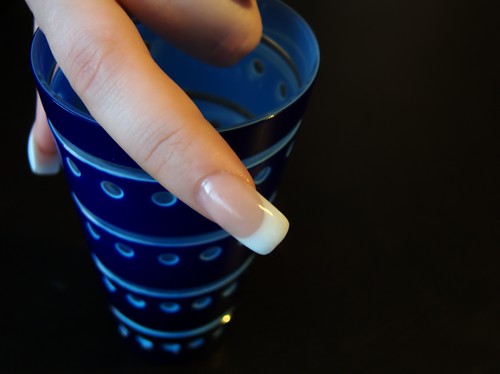
To have an effect on the pale foundation, white or beige nail polish is applied to the tips of the fingernails achieving a French style manicure; using opaque shades this time serves to contrast the former polish shades used. Similar to the former applications of polish, let each coat dry completely before applying the second or third layers of polish to achieve a better overall look. French nails are distinguished by the straight white strip across the nail tips; you can also go along the natural curve of the nail and doing this can actually make your nails appear longer.
Finalize the polish work with a clear coat applied on top of all the previous layers. Use an orangewood stick and a piece of cotton moistened with polish remover to remove any errors around the nail plate. It will now take a longer wait before you can start using your hands, about an hour or so; to achieve wonderful nails be sure not to ignore this crucial step in the overall process.
No comments:
Post a Comment